
Customize your email messages to encourage volunteers to open and read them. You can change the From Sender and Reply-To addresses, edit the visual design, insert special schedule-based links, include personalization fields, and more.
Note: If an individual has unsubscribed from Bloomerang Volunteer emails, they will not receive invitation emails.
If anyone in the recipient list unsubscribes from email communications, you’ll receive a prompt that lists which email addresses won’t be sent the message. You can then choose to contact them through a different method.
In this article:
What Can I Customize?
Customize these parts of your email message:
- From Sender — Default email address (do-not-reply-vms@bloomerang.com) or a Fully Verified email address. Recipients see this email address in their inbox.
- Sender Name — Name of the person or organization who sent the email. Recipients see this name in their inbox.
- Reply-To — Default email address (do-not-reply-vms@bloomerang.com), a Partially Verified email address, or a Fully Verified email address. Select a custom Reply-To address to allow recipients to respond and to send replies to a specific mailbox.
- Subject — A brief, compelling description of your message
- Message Body — Text, images, and links that you add and format in the rich text editor.
- Special Links — Links that volunteers can use to sign up, select and confirm shifts, download the mobile app, and more. Links correspond to a specific opportunity. For detailed instructions, read Creating Custom Schedule-Based Messages.
- Personalization — The volunteer's name, how many volunteer hours they contributed, and other personal information. For more information, view What are Personalization Fields?
You can also add attachments and save your message as a template.
Customize Email Messages
To customize an email message:
- Go to your organization or opportunity settings.
- Click Volunteer List.
- Select the recipients.
- Click Action.
- Select Send and then select Message.
- (Optional) To start with a template, click Select a Template. You can edit all parts of the message and save it as a new template.
- Keep the default From Sender or select a different one.
- Select a Sender Name. In this Sender Name list, you can also click Add Custom Sender Name.
- Keep the default Reply-To email address, or to select a different one:
- Clear the Use This Email as the Reply-to Address check box.
- Select a Reply To email address.
- Enter a Subject.
- To attach a file to the message, click Upload Attachments.
- To include a shift schedule in the message, click Insert Schedule. For detailed instructions, read Creating Custom Schedule-Based Messages.
- To insert links volunteers can use to interact with your organization, click Special Links.
- To add personalized information, click Personalize.
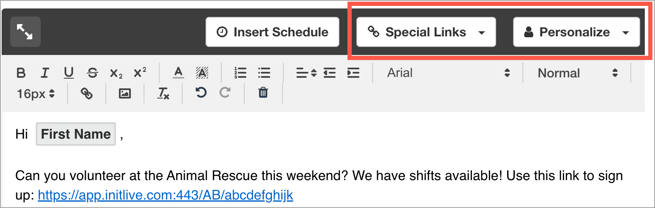
- Enter and format the message body. For example, apply headings and add images.
- (Optional) Click Save as New to save this customized email as a template.

- (Optional) Select a Template that you previously customized and saved. The template list includes all public and private templates that you created and all public templates that other managers in your organization created.
Preview Email Messages
As a best practice, we recommend that you preview messages before you send them. Preview the message on a desktop computer, tablet, or mobile phone. You can also select a recipient to preview personalization fields.
You can also send a test message to only your email address. 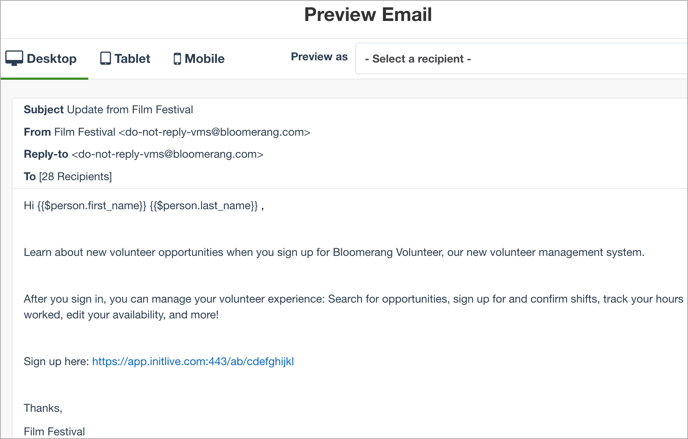
Related
- Create Custom Invitation Emails
- Create Custom Schedule-Based Messages
- Verify a Sender Email Address
- Change the From Sender or Reply To Email Address