
Create a shift to link the venue, location, role, and volunteers to a specific start and end time.
In this article:
- Create a Shift
- Select Shift Roles and Qualifications
- Add to a Series
- Set a Date, Time, and Place
- Enter Additional Shift Information
- Add Tags
- Add Volunteers to Shift Roles
- Set Shift Visibility
- Filter the Shift List
Create a Shift
To create a shift:
- Open the opportunity.
- Select the Schedule tab.
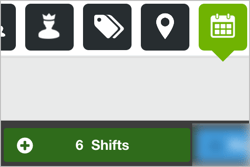
- Click Shifts.
Next, select shift roles.
Select Shift Roles and Qualifications
Next, select the roles available for this shift. Roles include default settings, which are applied when you schedule the role into a shift. To change the default settings for a role, select the Roles tab.
Tip: If a role requires a qualification, create the qualification before you create the role.
To add an existing role:
- Click Add Roles to this Shift.
- Click the boxes for the roles to add.
- Click Add.
To create a new role:
- Click Create a New Role
 .
. - Enter the Role Name.
- Enter the Role Description.
- Enter the Additional Role Details.
- Select the Signup Visibility:
- Public — Qualified volunteers can view and select public roles.
- Private — Only volunteers appointed by a manager can view private roles.
- Set the Default Scheduled Role Settings:
- Enter the number of Volunteers Required.
- Enter the number of Signup Limit.
- Select the Signup Visibility.
- Select the Waitlist Behavior:
- Block Waitlist Overflow: Role is marked as full when the signup limit is met
- Allow Waitlist Overflow: Role changes to a waitlist when the signup limit is met
- Waitlist Only (Gate & Approve): Volunteers sign up directly to the waitlist
Tip: To capture your volunteers’ interests, but to prevent them from adding themselves to shifts, select Waitlist Only. You can then manually approve each volunteer into the shift.
- Enter the Waitlisting Limit. This is the maximum number of volunteers who can join the waitlist.
- If the role requires qualifications, click Add Qualifications.
- Select one or more existing qualifications. To add a qualification to this list, go to the Roles & Qualifications settings.
- Click Save and Add to Shift.
Note: If you click Done without adding a role to a current or upcoming shift, or if you delete all the roles in a shift, the shift does not appear to volunteers during the signup workflow. Before you exit the shift, a dialog box opens to confirm your choices. Click Continue Editing Shift to return to the shift, or click Don’t Add Roles to continue without adding roles. To pause the message for 30 days, select the checkbox. This pauses all shifts in that opportunity.
(Optional) Next, add to a series.
Add to a Series
You can add a shift to a series to group with other shifts. A series is a group of shifts tied together to help streamline signup and editing.
To group the shift into a series:- Turn on Series.
- Select a series series from the list or create a new one.
- Click Create New Series
 to create a new series.
- Enter a title for the series.
Series titles must be unique. - Click Create.
- Enter a title for the series.
Next, set the date and time.
Set a Date, Time, and Place
Set a date, time, and place for the shift. Venues are optional when you add a shift to an opportunity. If you add a venue, locations are optional. For more information about venues and locations, view Create Venues and Locations.
- Select which date the shift occurs. By default, today's date appears.
- Select when the shift starts and stops.
- Select a venue from the list or create a new one.
- (Optional) Select a location from the list or create a new one.
Next, set additional shift information.
Enter Additional Shift Information
- Enter the Shift Title.
- Click the color wheel to select a color for this shift. This shift block appears in this color on the calendar.
- Enter a shift description. You can enter other information, such as links to shift-specific FAQ pages.
(Optional) Next, add tags.
Add Tags
Use tags to designate areas of interest about a shift. Tags can be visible (public) or hidden. For example, use hidden tags for internal tracking. Use visible tags to help volunteers decide which shifts to select.
For more information, view What Are Opportunity and Shift Tags?
To add tags to the shift:
- To add an existing tag to the shift, search for or select a tag and click Add Tags to this Shift.

- To create a new tag:
- Click Create New Tags.
- Select Create a New Category or Edit an Existing One.
- Configure the settings the category. You can add tags to a category, change the visibility setting, and select whether multiple tags can be assigned from this category.
(Optional) Next, copy the shift to specific dates or a recurring frequency.
Copy the Shift to a Date or Recurring Frequency
To repeat this shift, you can:
- Copy it to specific dates
- Copy it to a recurring frequency
To copy a shift:
- Click Actions.
- Select Copy Shift.
- To copy shifts to one or more dates, select To Specific Dates.
- To create a recurring shift, select To a Recurring Frequency. For detailed instructions, read Create Recurring Shifts.
Next, add volunteers to shift roles.
Add Volunteers to Shift Roles
To add volunteers to roles:
- From the role list, which appears left of the shift settings, select a role.
- To view volunteers who are best matched to this role, click Roster Mode. Qualifications, roles, and availability determine who is labeled as a best match. You can collect availability information during signup.
- In Roster Mode, if no volunteers are best matches, you can select different options: Volunteers with Matching Roles, Volunteers with Matching Qualifications, and Show All Volunteers.
Availability settings appear for each option if you turn on Availability: And Are Available, And Are Not Available, and Have Not Filled In Their Availability. - Select one or more volunteers.
- Click Add to Shift.
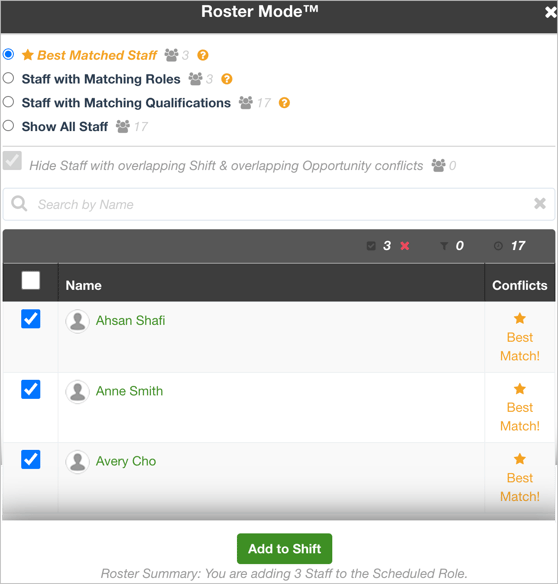
- Click Done.
Set Shift Visibility
At the lower right, select the shift state: Published or Draft. The public can view published shifts, but cannot view draft shifts.
Tip: Change shift visibility to Draft to finish setup later or to wait until a later date to make the shift visible to volunteers.

Note: If you click Done in a current or upcoming shift while the shift is in a draft state, the shift does not appear to volunteers during the signup workflow. Before you exit the shift window, a dialog box opens to confirm your choices. Click Continue Editing Shift to return to the shift, or click Leave in Draft State to continue without publishing the shift. To pause the message for 30 days, select the checkbox. This pauses all shifts in that opportunity.
Filter the Shift List
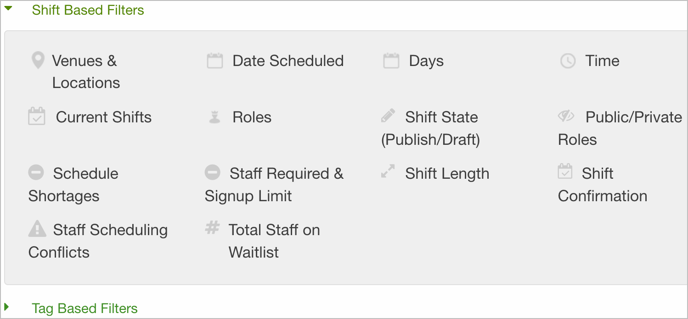
To find and sort the shifts in an opportunity, select filters. You can select several shift filters. If you have tags, you can select tag filters.
To filter the shift list by venue or location, you can select the venue or location, No Venue or No Location, or a combination of these options.
 For more information about filters, view Use Filters.