
When volunteers sign up for opportunities, you can ask for their availability. Availability tells you when they can and cannot work.
We recommend that you collect availability information–it helps you schedule only available volunteers for shifts. If you allow volunteers to select their own shifts, they can do so more easily because they can see availability conflicts and hide shifts they’re not available for.
In this article:
- How Availability Works
- Turn On and Set Up Availability
- Staff Enter Their Availability
- Use Availability Information to Schedule Shifts
How Availability Works
Each opportunity has an Availability setting, which is off by default. Turn on this option to collect availability information for a certain opportunity. If you turn on this option, decide which type of information to collect: General Availability or Date-Based Availability.
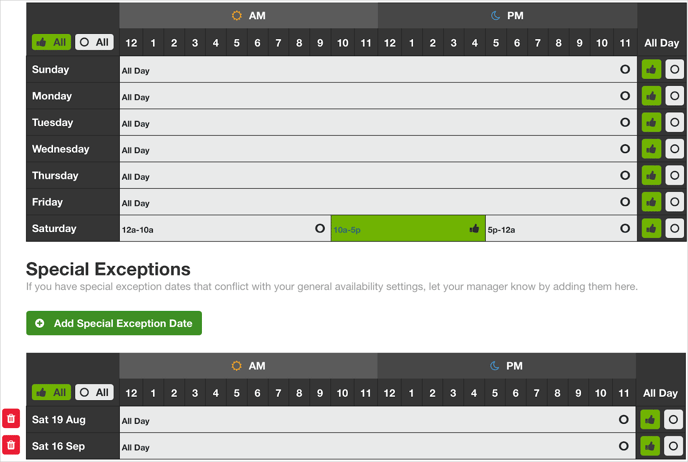
General availability tells you which recurring days of the week and times volunteers are available. This is the default option.
Volunteers can add special exception dates to let you know about conflicts. For example, a volunteer might be available every Saturday from 10 a.m. to 5 p.m, except for two specific Saturdays.
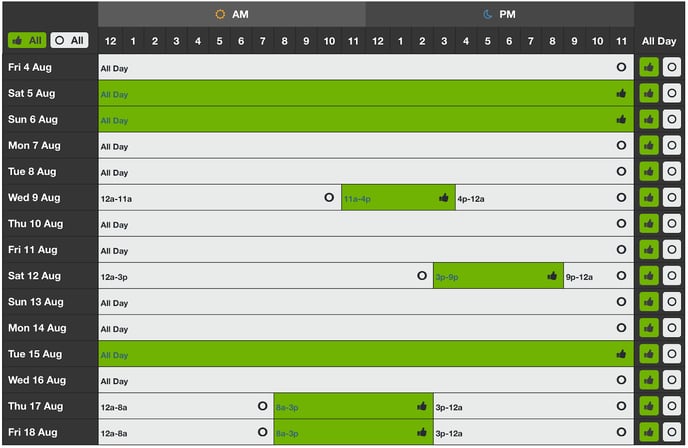
Date-based availability tells you the specific calendar dates and times that volunteers are available during an opportunity. This option is available only for opportunities that span fourteen days or fewer. When volunteers sign up for an opportunity, they see only the calendar dates that you define for that opportunity.
Turn On and Set Up Availability
By default, the Availability setting is off for opportunities. You can change this setting for an individual opportunity. Or, select multiple opportunities in your organization to change this setting in bulk.
To turn on and select the Availability type for an individual opportunity:
- Open your organization. If you are in more than one organization, open the organization for the opportunity you are editing.
- On the organization home page, click Opportunities.
- Click the opportunity.
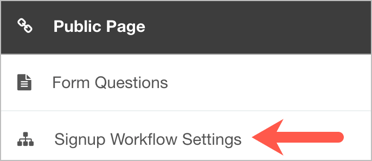
- From the Public Page menu, select Signup Workflow Settings.
- Turn On the Availability option.

- Click Advanced Settings.
- Select General Availability or Date-Based Availability. You cannot select Date-Based Availability for opportunities longer than fourteen days.
Tip: Avoid changing the availability type after staff begin to sign up. If you change the availability type during sign up, your opportunity might have both general availability and date-based availability information.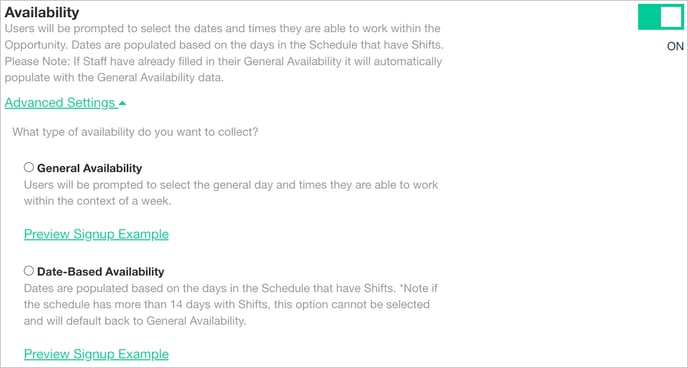
- If you changed the availability type, click Yes to confirm the change.
- To preview what staff see when they sign up for this opportunity, select Preview Signup Example, and then click OK.
To change the Availability setting for multiple opportunities:
- Open your organization. If you are in more than one organization, open the organization for the opportunities you are editing.
- Select Opportunities.
- Select one or more opportunities.
-
Click Take Action.
-
Select Edit Signup Workflow Settings.
- Click Select Steps to Turn ON or Select Steps to Turn OFF.
- Select Availability.

- Click Save.
For each selected opportunity, the availability setting is now changed. The availability type is General Availability by default. To change the availability type to Date-Based, you must make this change in settings for each opportunity.
Volunteers Enter Their Availability
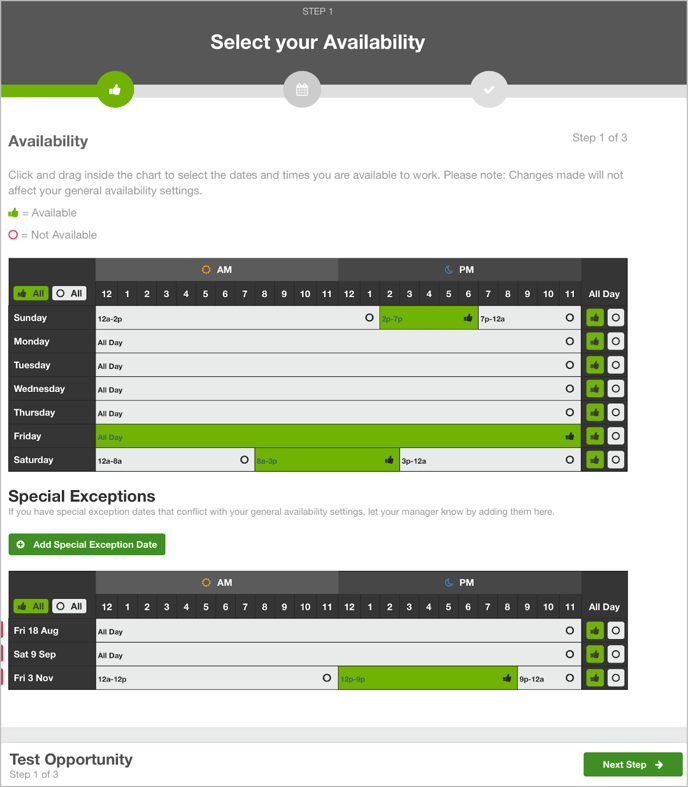
If you collect availability information, when volunteers sign up for the opportunity, the first thing they must do is enter their availability. For example, if you selected the General Availability option for this opportunity, a volunteer might enter their availability as follows.
Volunteers can also enter general availability information on the My Availability page, which applies to all opportunities. If a volunteer changes their availability for an opportunity, those changes do not affect the availability information entered on the My Availability page.
Use Availability Information to Schedule Shifts
After volunteers sign up for an opportunity and provide availability information, you can:
- Turn on the Consider Availability When Rostering option. If a volunteer is available or has conflicts for a certain shift, Roster Mode tells you. You can roster from the Volunteer List, Schedule, or Shift Detail pages for each opportunity.
- Filter the Volunteer list by availability.
- Run an availability report. For historical data, download a .CSV report to understand when volunteers were available in the past.