
To efficiently migrate hours worked information from another database, use the import tool.
To help you with this process, Bloomerang Volunteer:
- Generates an optional import template that you can download
- Guides you through the import
In this article:
- Before You Begin
- Download the Import Template
- Export Your Data
- Import Your Data
- View the Import History
- Resolve Errors
- Invite Staff and Volunteers
Before You Begin
Before you start the import, decide which opportunity to import to. During the import process, you must select a specific opportunity.
Download the Import Template
For extra guidance, download the optional import template. The template is a comma-separated values (CSV) file that includes these columns:
- First Name
- Last Name
- Date Hours Occurred
- Totals Hours Worked
- Additional Notes/Comments
To download the import template:
- Open the organization or opportunity.
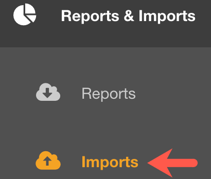
- Click Reports & Imports.
- Click Imports.
- Click Create New Import.
- In the Historical Hours Worked section, click Get Started.
- Click Download Template.
A file named hoursWorkedImportTemplate.csv downloads to your computer.
You can add your data to this template and use it as your import file.
Export Your Data
In the database you’re migrating from, export your hours worked data.
Keep in mind these requirements:
- The file type must be .CSV.
- You can import up to 15,000 users (rows) at a time, which means the file must contain 15,000 or fewer rows. If you have more users, split the import into separate .CSV files.
- The .CSV file must include these required columns: First Name, Last Name, Email, Date Hours Occurred, and Total Hours Worked.
- Total Hours Worked data must be in these formats: HH:MM (1h, 1h 15m, 15m, 1, 1:00, 1:15, 02:30) or decimal hours (0.5, 1.25, 10.75)
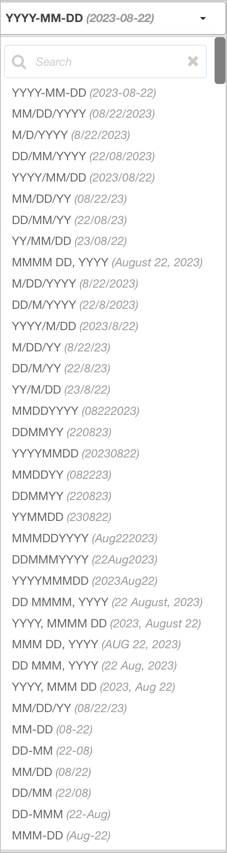
- In Step 2 of the import, you must select one date format from a list of supported options. The import tool supports many date formats.
- Duplicate or empty column headers are not allowed.
Import Your Data
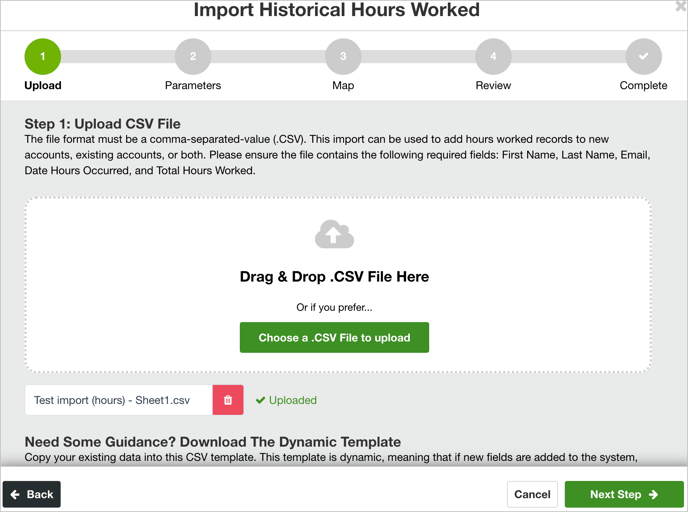
Step 1: Upload the Import File
To import staff and volunteers:
- Open the organization or opportunity.
- Click Reports & Imports.
- Click Imports.
- Click Create New Import.
- In the Historical Hours Worked section, click Get Started.
- Click Choose a .CSV File to Upload. Or, drag and drop your .CSV here.
- After the file uploads, click Next Step.
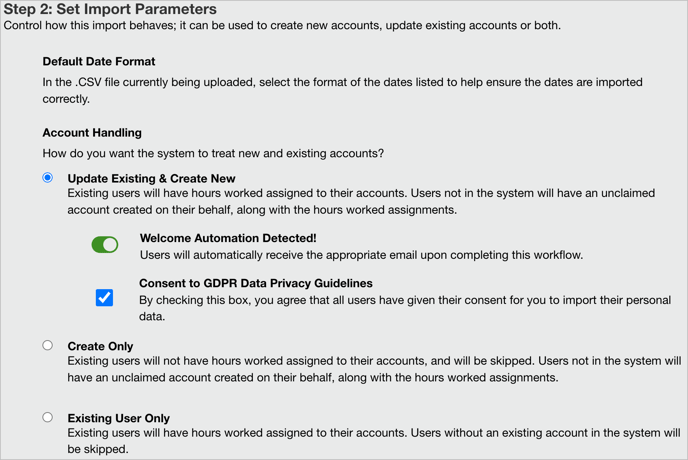
Step 2: Import Your Parameters
Next, set the import parameters:
- Select the Default Date Format used in the database you’re migrating from. The import tool supports many options.
- Select an opportunity.
- In the Account Handling section, select what you want the import to do:
- Update Existing & Create New — Assign hours worked to existing users. Create new users for anyone not in Bloomerang Volunteer, and assign hours worked to new users. New users will have unclaimed accounts.
- Create Only — Create new users for anyone not in Bloomerang Volunteer, and assign hours worked to new users. New users will have unclaimed accounts. Do not assign hours worked to existing users.
- Existing Users — Assign hours worked to only existing users. Do not create or assign hours worked to new users.
- To send a welcome email to new users created by the import, keep the Welcome Automation Detected setting on. This setting appears if you have a welcome email automation.
- Select Consent to GDPR Data Privacy Guidelines to agree that all users have given their consent for you to import their personal data.
- Click Next Step.
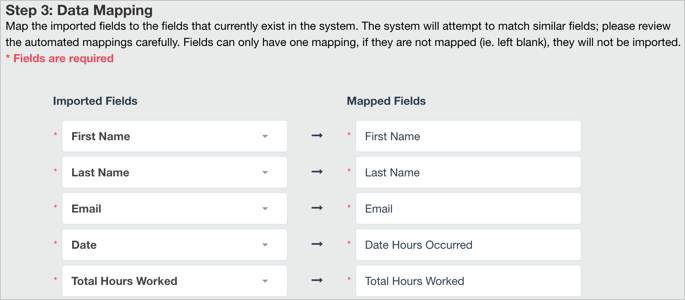
Step 3: Map Your Data
Next, map your data. When you map data, you match fields in your import file to fields in Bloomerang Volunteer.
To make the import easier for you, fields map automatically in some cases. Fields with identical names automatically map, regardless of capitalization. Fields with common alternative names automatically map. For example, E-mail maps to Email.
You can also manually map fields. You do not have to rename fields to exactly match Bloomerang Volunteer fields.
The Imported Fields list shows the fields in your .CSV import file. The Mapped Fields list shows the fields in your .CSV import file.
To map your data:
- Make sure each row in the Imported Fields list maps to the correct row in the Mapped Fields list. You can select a different field from a drop-down list.
- To manually map fields, select or search for an option from the Imported Fields list. You must map required fields. You cannot map the same field twice.
- To exclude a field from the import, don’t map it. You can also leave the field empty.
- Click Next Step.
If you don’t map a field, select whether to continue. Bloomerang Volunteer warns you about unmapped fields.
Step 4: Review Data Mappings and Run the Import
Before you complete the import, review the import sample. The sample includes the first fifteen rows to be imported.
To make changes, click Back.  To run the import, click Submit. The import starts immediately.
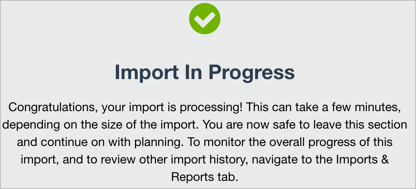
After the import completes, Bloomerang Volunteer emails you a confirmation.
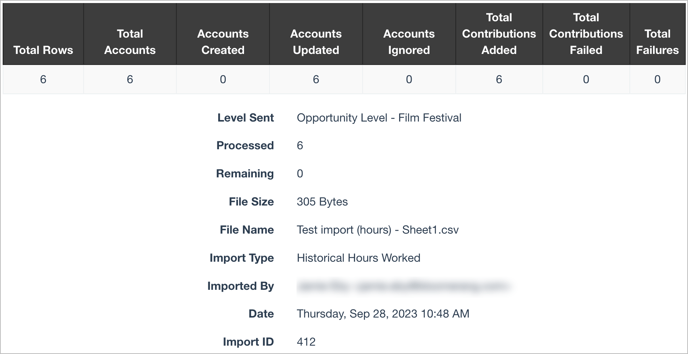
View the Import History
You can view a list of every in-progress or completed import. For each import, you can view these details:
- Status: A blue icon
 indicates the import is in progress
 - Import type: Historical Hours Worked
- Import location: Initiated at the organization level
 or opportunity level
- Opportunity selected
- Date and time
- Who ran the import
- Number of rows imported
- Number of accounts created, updated, and ignored
- Number of cells with errors
To review the import history:
- Open the organization or opportunity.
- Click Reports & Imports.
- Click Imports.
All in-progress and completed reports appear in a list.
- To see more information about an import, hover over the row and click Details.
- To see an import summary, click Details.
- To view how you mapped the data, click Mappings.
- To view a list of new accounts created by the import, click Accounts Created.
- To view a list of existing accounts updated by the import, click Accounts Updated.
- To view a list of account ignored by the update, click Ignored Accounts.
- To review rows in the import file that have errors, click Error Logs.
Resolve Errors
The import excludes rows in your .CSV file when:
- First Name, Last Name, Email, Date Hours Occurred, or Total Hours Worked are empty
- Duplicate email addresses exist in the import file
- Data isn’t entered correctly, such as an invalid email address
To resolve errors for rows that didn’t import:
- Open the opportunity.
- Click Reports & Imports.
- Click Imports.
- Click Error Logs.
- Click Download Error File. This file includes only rows with errors.
A file named error_logs.csv downloads to your computer. - In the error_logs.csv file, edit each row to resolve the issue.
- Import the corrected error_logs.csv file.
Invite Staff and Volunteers
If the import created new users, send an invite to welcome those volunteers. From the invitation email, users can claim their account, set a password, and sign up.
If you have a Welcome Automation set up, Bloomerang Volunteer automatically sends the welcome email if you selected the Welcome Automation Detected option in the import settings.