%20copy.png?height=120&name=Bloomerang-Volunteer-White%20(1)%20copy.png)
Set up opportunity details, signup settings, and everything else you'll need before you open your opportunity for registration.
In this article:
- Customize the Public Page
- Customize the Registration Form
- Set Up the Signup Workflow
- Open the Opportunity for Registration
Customize the Public Page
The public page is where volunteers learn about your opportunity, sign up, select shifts, and share on social media. You can customize the content and design.
To customize the public page:
- In the settings for your opportunity, select Recruitment
 .
. - In the Public Page Toolbox section, edit these settings:
- Page Settings: Primary Manager, Available Positions, Timezone, Start and End Date, Preview Shifts, Preview Leaderboard, and Signup Button Text. View Change the Public Page Settings.
- Logo: A small square image of any size. Bloomerang Volunteer automatically compresses the image.
- Tag Opportunity: Add tags to this opportunity.
- Key Information: Opportunity Name, Time Commitment, Schedule Style, Address, Directions, Website, Email, and Phone Number.
- Cover Photo: A large banner image that is 1500 x 1500 pixels in size. When you upload the image to Bloomerang Volunteer, you can crop it.
- Page Descriptions: Text that appears on the opportunity page and card.
- Share on Social Media: Share this opportunity on popular social media platforms.
- To add information that volunteers can view only after they join the opportunity, go to the Private Opportunity Details section:
- To add a private contact name, email, and phone, click Additional Details For Volunteer.
- To upload documents to this opportunity, click Documents.
- Click Save.
A preview of your public page appears in the Public Page Preview section.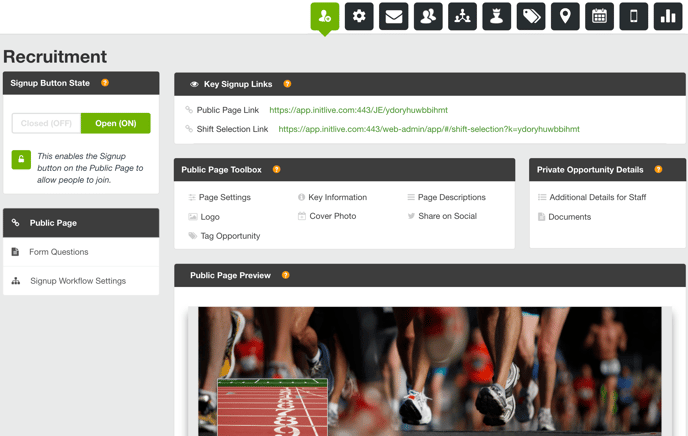
Customize the Registration Form
When volunteers register for an opportunity, you can ask questions to gather information that is important to your organization. You can:
- Enable the template questions.
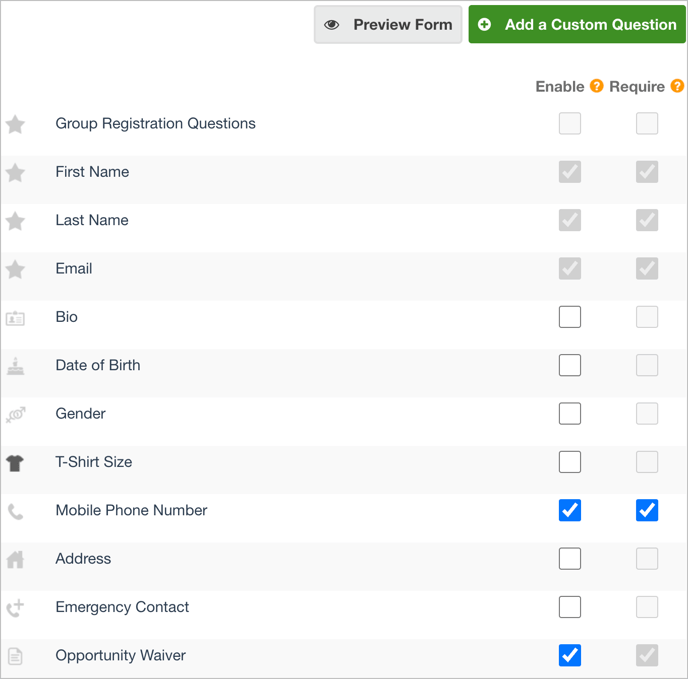
By default, the registration template includes several questions and a waiver. The First Name, Last Name, and Email questions are always enabled and required. You can enable and require other template questions and the Opportunity Waiver. - Add your own custom questions.
- Use organization-level custom questions in this opportunity.
If users already answered organization-level custom questions, they are not prompted to answer these questions again.
To add custom questions and a waiver to your registration form:
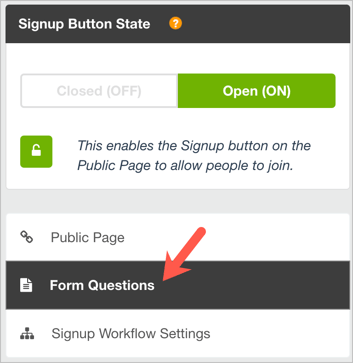
- On the Recruitment page, select Form Questions.
- To add a question:
- Click Add a Custom Question.
- Enter the Question and Question Nickname.
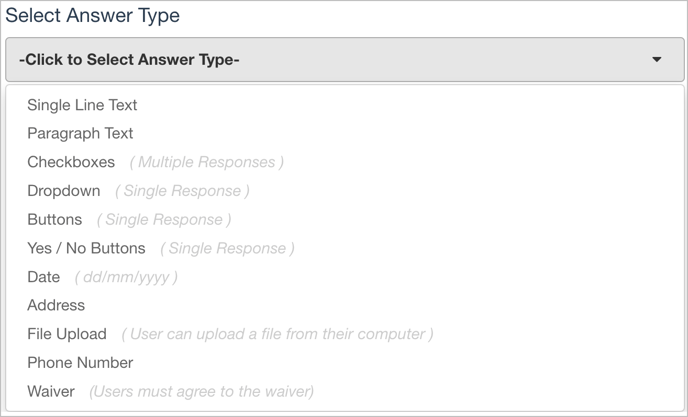
- Select the Answer Type.
- If you select Checkboxes, Dropdown, Buttons, or Yes/No Buttons, you can select Add a Sub-Question.
- To add a waiver, do one of the following:
- Edit and enable the existing Opportunity Waiver template
- Click Add a Custom Question and select Waiver.
- If you add a waiver:
- In the Opportunity Waiver Content box, enter the content that volunteers must read and consent to.
- From the Select Consent Style list, select Checkbox Agreement or Collect an E-Signature.
- If you select Checkbox Agreement, enter the Custom Agreement Text.
- To enable a question so it appears on the form, select Enable.
- To require users to answer this question, select Require.
Note: Because of data privacy laws, you cannot select Require for these template questions: Bio, Date of Birth, Gender, or T-Shirt Size. However, you can add these questions as custom questions to modify or require them. - To edit a question, hover over the question and click Edit.
- To delete a question, hover over the question and click Delete.
- To preview what volunteers see when they sign up, click Preview Form.
If you enable a waiver on the form:
- If you select Checkbox Agreement, users must select a checkbox on the registration form to agree.
- If you select Collect an E-Signature, a signee must type their name and draw their signature on the registration form. The signee can be someone else, such as a parent or guardian of a minor who is volunteering with your organization. As a Bloomerang Volunteer administrator, you can sign on behalf of a user, which could happen if they are with you in person.
- In a volunteer's profile, you can view an image of the waiver signature, the date it was collected, and which Bloomerang Volunteer account was signed in when the signature was collected. You can also add a signature on behalf of the volunteer.
- From a volunteer's profile, you can download the waiver agreements that the volunteer completed and save or print them for your records. If a waiver agreement was updated more than once by the volunteer or an admin, you can choose which version of the agreement to download.
- On the Volunteer List page, you can add the Opportunity Waiver filter and select the Has Accepted or Is Pending filter options. Has Accepted means the user signed the waiver. Is Pending means the user has not signed the waiver.
Set Up the Signup Workflow
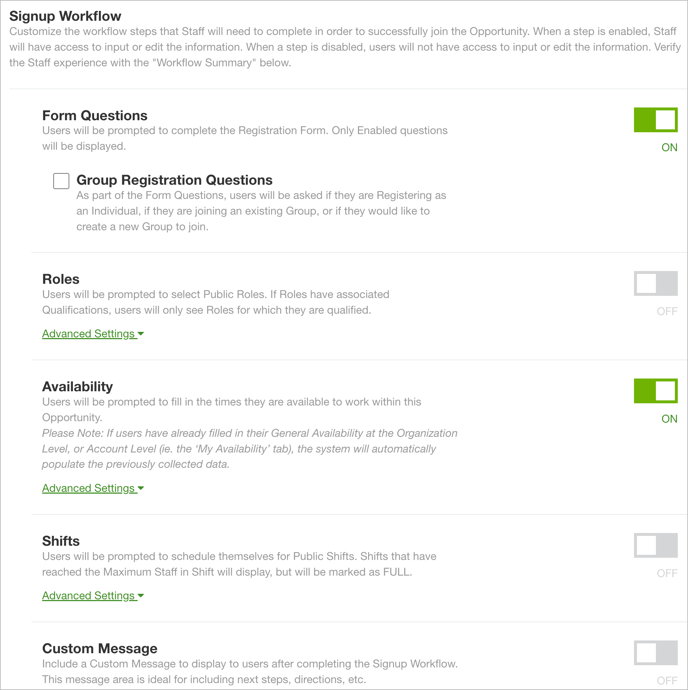
After you select the form questions, set up the signup workflow. This workflow controls the steps that volunteers must take to sign up for the opportunity. You can turn on or off any workflow settings to meet the needs of your organization.
For one-click signup, turn off all of these settings and turn on the Signup button. Users can sign up with one click, which means they don’t have to complete signup steps or form questions.
If you turn off all Signup Workflow settings, but turn on the Signup button, volunteers can sign up only if an administrator adds the users to the opportunity.
To configure the signup workflow settings:
- On the Recruitment page, select Signup Workflow Settings.
- Turn these settings on or off:
- Form Questions: Ask users to complete a registration form. The form includes only the questions you selected in the Form Questions settings.
- Group Registration Questions: Ask volunteers whether they are registering as an individual, joining an existing group, or creating a new group
- Qualifications: Ask volunteers to select qualifications.
- Roles: Ask users to select roles. You can set the minimum and maximum number of roles that users can sign up for.
- Availability: Ask volunteers when they can work. You can collect general availability or date-based availability.
- Shifts: Ask volunteers to select their own shifts. In the Advanced Settings, you can set the minimum or maximum hours or shifts that users can sign up for. You can limit hours and shifts by day or by opportunity. For example, you can make sure that volunteers sign up for a minimum of three shifts over the entire opportunity.
- Custom Message: Show users a message after they sign up. This message might include next steps or directions.
Open the Opportunity for Registration
After you set up the signup workflow, open your opportunity for registration.
To open an opportunity for registration:
- On the Recruitment page, select Signup Workflow Settings.
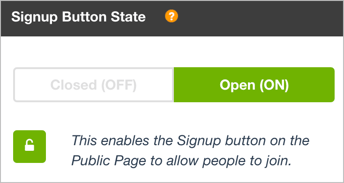
- In the Signup Button State section, click Open (ON).
- In the Key Signup Links section, find the Public Page Link. Share this link with your supporters. For example, you could post this link to your website, send it to your Organization Volunteer List, or share it on social media. Anyone who clicks the link can register for the opportunity.

After recruitment ends, change the Signup Button State to Closed (OFF).
Next Steps
Configure the Signup Visibility settings to control who can see this opportunity.