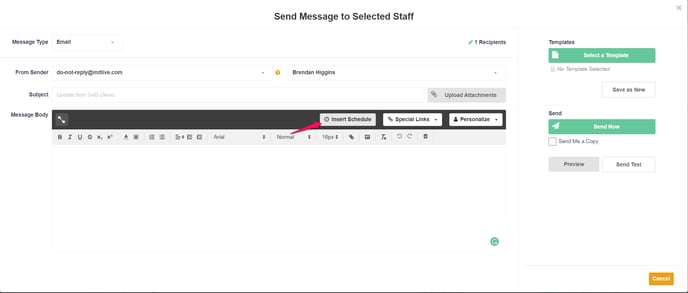
If you are looking to send out shift confirmations to your volunteers you can do so with the send message pop-up and the Insert Schedule option. This allows you to send out the shift confirmation as part of a message that can include any other information you want, as well as it can be saved as a template to be easily sent at any time.
Step 1: Insert Schedule
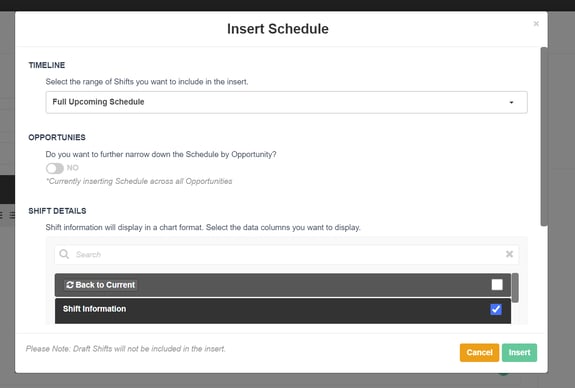
If you are looking to send out a Personal Schedule to volunteers, this can be done via the Insert Schedule option in the send message pop-up. When using the Insert Schedule option, Managers are able to customize the date range for the Shifts as well as which Shift based columns will be displayed.
For example, if you only want to send the following week's Shifts to all volunteers selected, then you can choose that option and then decide on how much info you want to be presented to the users. By choosing the correct columns, the volunteers will be presented with the most important information about their shifts.
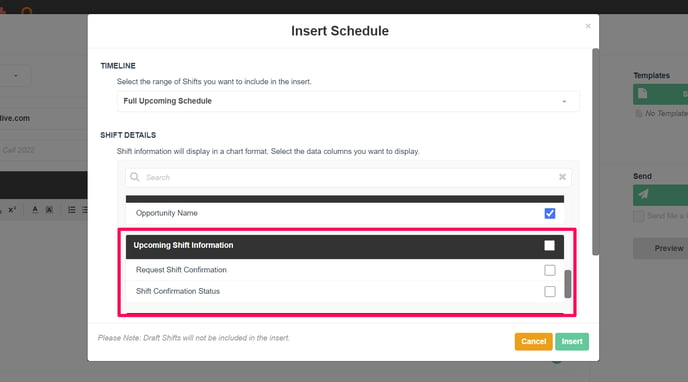
Step 2: Request Shift Confirmations
When inserting the Schedule there is the option to also send Shift Confirmation requests at the same time. While selecting which columns to be included on the insert Schedule, managers can also choose to request a Shift Confirmation in that email. When requesting a Shift Confirmation via the send message, users will be able to Confirm or Decline their Shifts directly from the email without having to log into the system.
Whether they Confirm or Decline the Shift, another browser tab will open to confirm the action. If they are Declining the Shift, they will be prompted to enter a reason. If a user attempts to Confirm or Decline a Shift they have already responded to, a tab will open letting them know and instruct them to log in if they need to change their response.
Step 3: Review Before Sending
Once you have gone through and added all the text, Special Links, and Personalization Fields, and Inserted the Schedule, you will want to review the message using the preview feature. You are also able to send yourself a test to ensure everything is how you planned it. When looking at the preview, you can see what the email will look like on a desktop, tablet, or mobile phone and select from the list of recipients to see the email with Personalization Fields filled out.
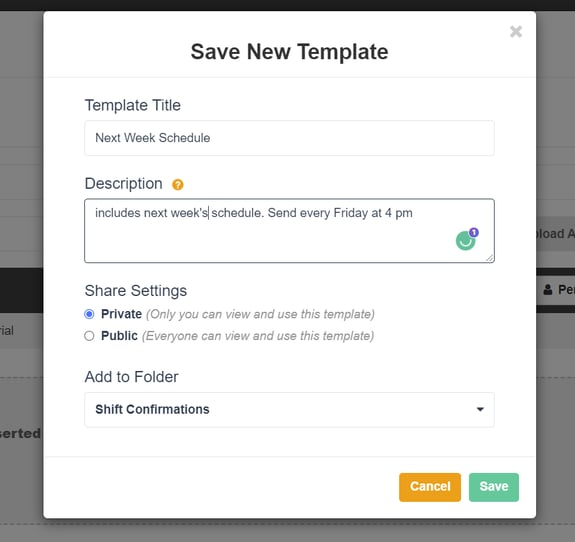
If this is a message that will be sent regularly, you can also save it as a Template so that you can easily send out the next week's Shifts every Friday without having to re-create the entire message.